Sidenote: This is the second of three new weekly features I’m introducing. New to the Queue will appear each Monday and will feature patterns added to Ravelry during the previous week that I love enough to add to my queue. The third feature, Yarn of the Week, will appear Wednesday.
Mini Lovey Blankie Menagerie

Photo courtesy of Rainebo on Ravelry.
I cannot get over how adorable these little lovies are. I may still only be in the planning stages for my wedding, but I will definitely be making a few of these for my own kids when I have them in a few years. My fiance’s nephews have similar lovies and they love them, so that combined the handknit (and extreme cuteness) factor of this pattern makes it an instant queue for me.
Price:$6 USD
Craft: knitting
Designer: Lorraine Pistorio
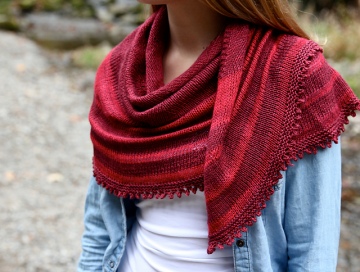
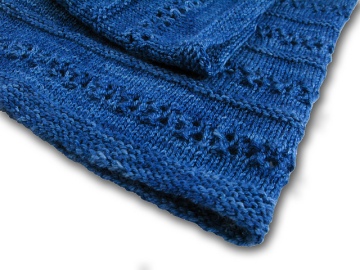
Flight Home Shawl
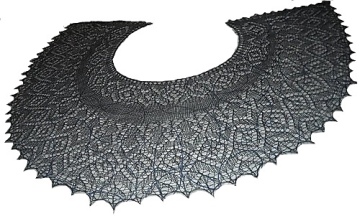
Photo courtesy of YuliaAV on Ravelry.
I love the way the lace patterns in this shawl work together. The diamonds bend with the semicircle shape of the shawl so nicely, and wherever the shaping is it blends in well enough that I can’t actually see it. I also love that the shape of this shawl wraps around, so it would have no trouble staying on my shoulders.
Price: $5 CAD
Craft: knitting
Designer: Yulia Vysochina
Country Cottage Pillow Cover
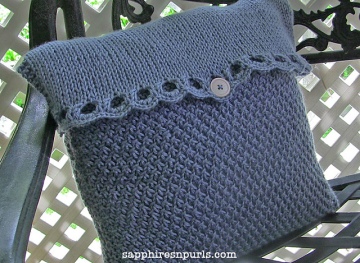
Photo courtesy of BibbityBobble on Ravelry.
As soon as I saw this pattern, I had to queue it. I’m currently in cool-things-for-the-house mode, having recently completed setting up wedding registries with my fiance. These pillow covers will be perfect for our future house, and I can make our pillows the exact colors we want!
Price: free
Craft: knitting
Designer: Beth Richardson
Stray Cat
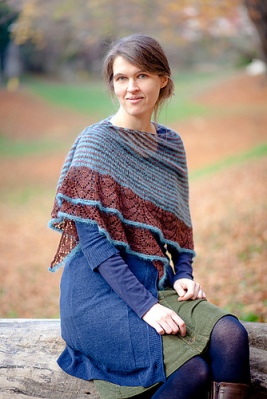
Photo courtesy of AnimaKnits on Ravelry.
This shawl caught my eye after I saw a finished project of it on the Ravelry forum radar. I love the use of stripes to keep the solid interior section interesting, and the transition to a lacy border for a bit of flair at the end.
Price: $6 USD
Craft: knitting
Designer: Kristina Vilimaite
Blairsden

Photo courtesy of SFAlpacas on Ravelry.
I have a thing for stripes this week, apparently. This sweater jumped out at me from the pattern search this weekend. I love that the stripes begin around the bust and end before the waist. There’s enough striping to make the sweater interesting, but they don’t overwhelm the design. I have a feeling this cardigan will find its way into my wardrobe soon.
Price: $5 USD
Craft: knitting
Designer: Maria Olson